Uploading Web Pages and Images
Publishing or uploading files and images to your web hosting account can be time consuming and sometimes a very confusing experience.
Let's face it the File Managers that are provided with most web hosting control panels are just junk.
Not only are they junk, but they are slow as molasses.
Each time you upload a file or image you have to navigate to the directory or folder that you want to upload to and then use a Browse function to find the item on your computer.
FTP Client
Thank God for third party FTP tools called FTP Client software.
There are several free ones that are worth checking out.
Note: If you are using HTMLPad 2014 to build web pages, the FTP Client software is built into the editor.
Save your pages then click Publish Project to FTP
Easy Publishing
No more switching programs to publish your page and images.
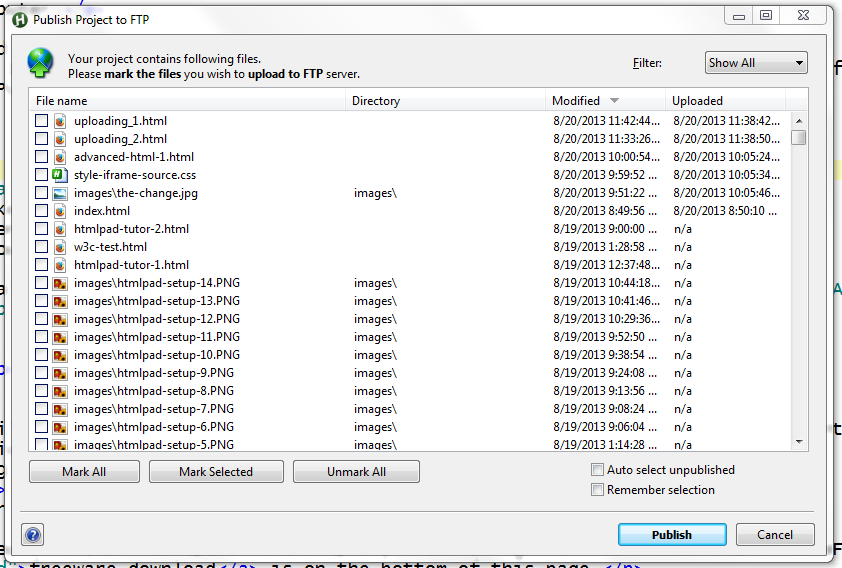
Click Project - Publish Project to FTP
Upload the entire site or just the pages and images you Select.
HTMLPad 2014 makes uploading files EASY.
Download your free trial of HTMLPad 2014
Free FTP Software
CoreFTP Setting up for Transfers Step #1
Uploading pages you create to your web space is a simple process using the free FTP software, CoreFTP. The link for the freeware download is on the bottom of this page.
Install CoreFTP using the Control Panel Add/Remove function. We tested CoreFTP on Windows XP and Vista. The program worked flawlessly until we added the voice pack. This caused the program to freeze up. Disabling the sound feature restored the program to full functionality.
You'll need a web host before you can upload your pages.
Before you start the process of setting up your web space for uploading, you'll need some information. When you purchase your web space you are given an ftp server name. This information is usually sent by email or you can obtain it by visiting the control panel of your web space. You will also receive instructions on how to get this kind of information.
The ftp server name will usually be ftp.sitename.com where site name is the URL of your website. You are also provided a username and password for logging on to your control panel. These 3 items will be needed to proceed.
When you have that information in hand, start CoreFTP.
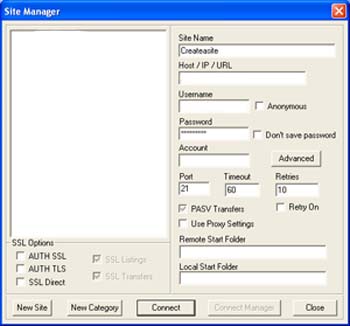
When the CoreFTP opens there are 2 windows. The front window is the Site Manager.
Step #1
To set up your website for transfers we need to add your ftp server information in the appropriate boxes.
Start by clicking New Site, which is located bottom left of the window.
Site Name is just a placeholder for your information.
ftp.yoursite.com goes in the box marked Host/IP/URL.
Username and Password go in their respective boxes.
To Connect CoreFTP to your website,
1...Connect to the internet
2...Highlight the Site Name in the left window of the Site Manager frame.
3...Click Connect (Bottom)