HTMLPad 2014 Tutor
Less Typing is Better
One of the advantages of using an HTML editor is that it cuts down on the amount of actual typing you need to do.
HTMLPad provides a lot of powerful options for doing this.
1...You can Run the program as administrator and create your own page templates or modify the ones that already exist.
2...You can create your own coding snippets and add them to the HTML, CSS or PHP libraries.
3...You can modify the existing code snippets.
Did I mention, all of these things are easy to do?
In this lesson we'll show you how to perform all of the tasks mentioned above.
We'll also show you how to easily keep your code W3C compliant.
Ready for an HTML Editor?
 You may be by the time you finish this tutorial.
I use HTMLPad 2014 for creating my websites.
In my opinion, it's the best full featured HTML 5 editor on the market for Any Price.
Better code editing features than most of the 'over priced' editors.
You can't make a mistake without seeing it immediately.
It has built in FTP for uploading your pages to your server.
For advanced users, it syncs up easily with a local host server for testing forms and scripts right on your PC.
Try it free for 30 days. Fully Functional!!
Download your free trial of HTMLPad 2014
Get Started Right!!!!
Changing the Default HTML Template
If you finished the first lesson on set up and made the necessary adjustments you should be able to complete this exercise fairly easily.
As I mentioned in order to modify the templates you need to be running the program as the administrator.
If HTMLPad is running, shut it down. To restart, right click on the start up icon and choose Run as administrator.
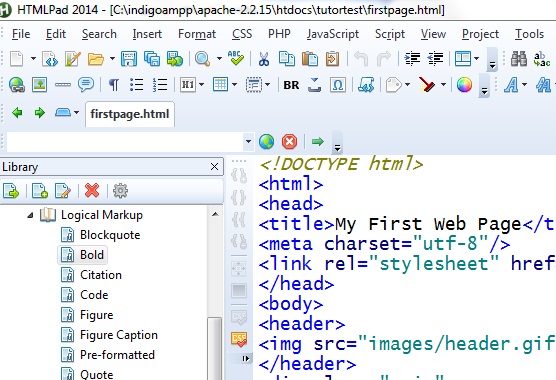
Now, click File - Open. Navigate to Program files and find the HTMLPad 2014 folder. Then find the templates folder and look for Default.htm
Open the template in the editor.
What ever code shows up, I guarantee it isn't W3C compliant.
Replace it with the code shown below and save the file.
<!DOCTYPE html>


<html>


<head>

  <title>Untitled</title>

  <meta charset="utf-8"/>

  <link rel="stylesheet" href=".css" type="text/css"/>

</head>


<body>


</body>


</html>
Now when you start a new page, this is the HTML 5 code you'll get when you click File - New - HTML.
The original code didn't include the meta charset tag and we added the style sheet link to cut down on typing.
Create a Page and Test It
Click File - New - HTML
Change nothing and save the page as w3c-test.html in your htdocs or desired folder
Click Tools W3C HTML Validator. The result: Valid HTML 5 document.
Note: You will get 1 warning and that's just because the validator for HTML 5 is still in the development stages.
Start with clean code and you're more likely to end up with clean code in the end.
Modifying Code Snippets
Code snippets can be accessed from the code Library.
If you don't have a Library list on the left side of the editor window, click View - Library
To see what a snippet does, click the little arrow which should be beside the HTML folder at the top.
Set your cursor under the body tag on the w3c-test.html page.
Under Sectioning - double click - Header
This code is added to the page.
<header></header>
Now, since you can have more than one header element on a web page it is wise to create classes for them.
Let's add the class attribute to the snippet.
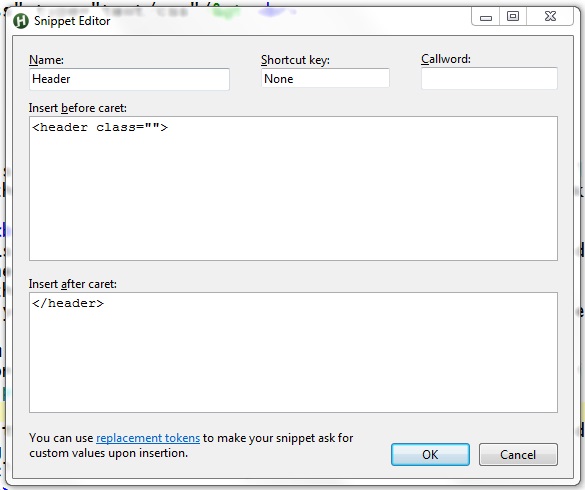
Right click on Header in the Library. Choose Edit snippet.
In the top box, change the code to:
<header class="">
Leave the bottom box as is and click OK.
Now set the cursor on the page again and double click Header.
You can repeat the process for the Aside, Navigation, Section and Footer elements. You'll use these the most. Change them all if you like.
Before and After the Caret
Say what?
When you opened the Edit snippet dialog, there were 2 boxes.
The top box says Insert before caret.
The bottom box says Insert after caret.
When adding snippets of code to a page you will sometimes want your code to enclose an element or word on the web page.
For instance, if you wanted to Bold the words Get Ready on your page.
If you placed the cursor in front of the words, you'd get an open and close bold tag before the words when you double clicked on the bold snippet.
<b></b>Get Ready
However, because we separated the tags into before and after caret, we highlight the two words and double click the snippet in the Library.
The Open bold tag is placed in front of the words (before the caret) and the closing bold tag is placed after (after the caret) the 2 words.
<b>Get Ready</b>
Add New Code Snippets
I create most of my new snippets under Basic Tags.
Here's a snippet that will come in handy.
Right click on Basic Tags in the Library.
Choose New snippet
In the name box type: Span
In the top box type:
<span class="">
In the bottom box type:
</span>
Click OK
You created a snippet for the span tag.
Here's another snippet you need to add.
Right click on Sectioning in the Library.
Choose New snippet
In the name box type: Division
In the top box type:
<div class="">
In the bottom box type:
</div>
Click OK
A Step Further
Suppose when you added a division to your page you wanted the editor to prompt you for its name.
Right click on the Division snippet. Choose Edit snippet.
In the top box type:
<div class="%[Prompt message]=[class name]%">
In the bottom box type:
</div>
Click OK
Practical Use: You've started your web page and have quite a bit of time in on its content. You find an article that you want to place beside the content at the top of the page.
Highlight the text that you would want to appear in your left column and click the Division snippet which asks you for the name of the division class. (left in this case)
Set the cursor below the closing Division tag and click the snippet again. Respond with the name right and fill the right division with your article content.
The More the Less
As you gain experience and knowledge, you'll want to create and modify more snippets of code and more templates.
The more you create, the less you have to type.
Next Up
Got a Question?
Send me your questions about using HTMLPad 2014.
If you would like a direct response, please include your email address.
(We will not keep your email address)